When you grind coffee beans, you often get a better-tasting, more aromatic, and fresher cup of coffee when compared to instant or pre-ground coffee. Hence, it’s more than enough reason to encourage the popularity of grinding coffee beans at home. If you’re reading this, there’s a good chance that you value the taste and freshness of your coffee and are already taking the appropriate steps.
However, if you have a new coffee grinder, you may be wondering how to use it, especially if you purchased a slightly less intuitive burr coffee grinder.
This article will teach you how to use a coffee grinder using five basic steps and answer some regular coffee grinding questions to help get the most out of your new grinder. A great cup of coffee awaits!
Getting Started: Coffee Grinder Basics Explained
What Are the Different Types of Coffee Grinders?
Before we start explaining the grinding process, we should cover a few basics to help you get a better understanding of coffee grinders overall, including what types you can choose from. The two main types of coffee grinders are blade grinders and burr grinders.
Blade Grinders
A blade grinder features a propeller-like blade inside a grinding container. The blades spin and chop coffee beans in short bursts until a finer consistency is achieved. A blade grinder creates a less consistent grind but is super fast and easy to use. All you have to do is load the beans and press on the lid for a few seconds, and your beans are ready for brewing.
However, blade grinders tend to create a bit more of a mess thanks to the static charge created by the fast-spinning blades, which easily spread ground coffee on the surrounding countertop. In addition, a blade grinder does not have a precise grind size adjustment. Instead, it relies on the amount of time you run the blades. A consistent and precise grind size leads to a better-tasting cup of coffee which brings us to burr grinders.
A blade grinder can also make a mix of spices or even nuts. Although, you probably don’t want to use the same grinder for both coffee and a mix of spices, as the flavour will most likely transfer from the food items to the coffee regardless, even if you try to clean it fairly well.
Burr Grinders
Burr grinders come as hand grinders or electric grinders. These grinders feature two serrated plates that grind against each other crushing coffee beans. The grinding plates are called burrs. Burr grinders don’t typically function at high speed like blade grinders, primarily hand burr grinders, but they enable a precise and highly consistent grind size.
Many people choose to use a hand grinder because electric grinders create more heat, which is the best for preserving the flavour of the coffee, and a hand grinder takes up significantly less counter space than a fully electric machine.
What Grind Size Setting Should You Use?
One of the main settings you will want to manipulate and get a good understanding of when grinding coffee at home is the grind size setting. The grind settings range from fine to medium to coarse, and the setting you choose depends on the brew method you will be using to make your coffee.
Recommended Grind Settings Based On the Brewing Method:
- Espresso machine: Extra fine to fine. Due to the high-pressure brewing method used by espresso machines, a fine grind is best as it allows the hot water to extract as many nutrients and as much of the flavour as possible.
- Drip Coffee Maker: Medium-fine to fine. A medium to medium-fine grind size achieves the best results when brewing typical brewed coffee. The medium-sized grounds are large enough to stay in the grounds basket but small enough to brew quickly.
- French press and Pour-Over Coffee: Coarse. A coarse grind works well with French press and pour-over coffee because it helps keep grinds out of your cup while still extracting flavour, aroma, and all the necessary caffeine.
- Cold Brew Coffee: Extra-coarse to coarse. An extra coarse grind size helps facilitate the slower, cold brewing process and prevents stray grounds from making their way into your finished cup of coffee.
Using Your Burr Coffee Grinder: A Beginner’s Guide
Step 1: Choose the Correct Grind Size
Choose the correct grind size for your preferred brewing method and turn the numbered ring to the correlating position. Whether you have an electric burr grinder or a hand grinder, the grind settings are typically adjusted using a numbered ring that brings the burrs closer together or further apart. The lowest number is the finest setting, and the highest number is the coarsest grind setting.
The numbered ring is located on the top of the grinder with a hand grinder. The best time to adjust the grind setting is before you load coffee beans into the grinder, as it produces a more consistent grind size and is easier to adjust.
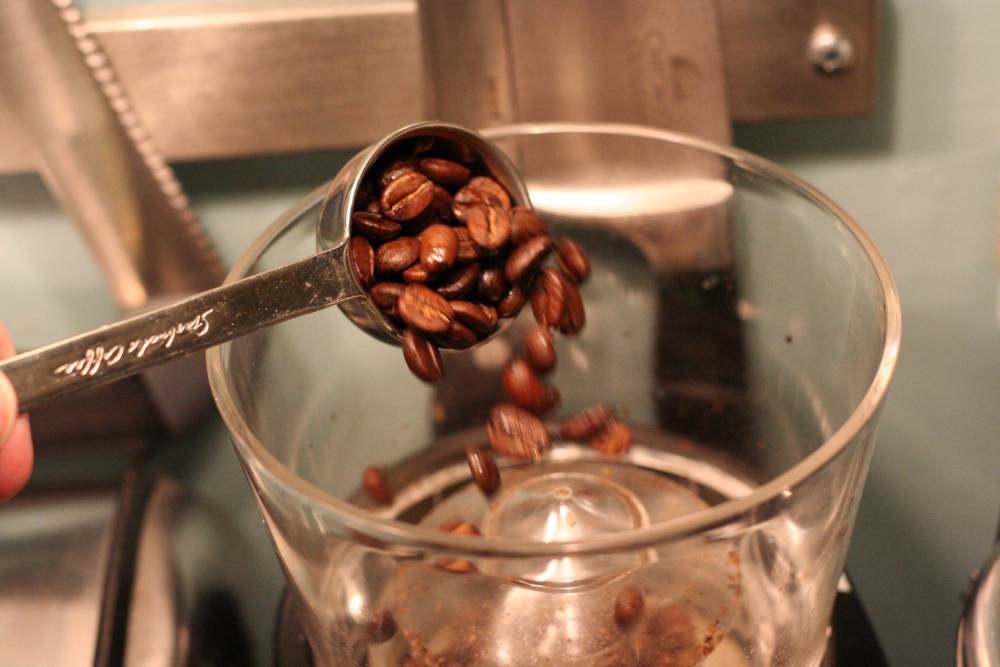
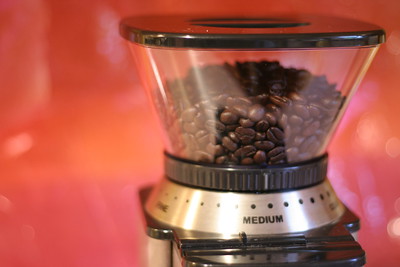
Step 2: Load Your Burr Grinder With Coffee Beans
Open the lid of your coffee grinder and add your coffee beans to the hopper. With a hand grinder, you will need to grip the base with one hand and untwist the lid on top with the other hand. Once unlocked, simply lift the lid off the base to access the bean hopper.
An electric burr grinder may have a hopper lid that simply lifts off, depending on the size.
How many beans you add will depend on how much coffee you make. We recommend only grinding what you need for the morning or the current moment to keep your coffee as fresh as possible.
Once loaded, replace the lid and screw it firmly back into place.
Step 3: Adjust the Grind Time (for Electric Grinders)
Larger electric burr grinders with a large hopper may also have additional settings, such as a grind timer. An adjustable grind time allows you to make a specific amount of ground beans without having to measure it out manually. The timer typically has marks denoting the number of cups you wish to make. Turn the timer dial to the correct amount of coffee for the moment, and you are all set.
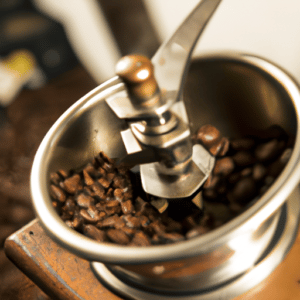
Step 4: Grind Your Coffee Beans
Now it is finally time to start grinding your coffee beans. On an electric grinder, you will simply push a button.
On a hand grinder, you will need to turn a handle to activate the grinding process. The best way to do this is to rest the base on a flat surface and press down on the top with one hand while you turn the handle with the other. Start turning the handle in a clockwise direction.
After you grind a bit, look at the ground catcher to make sure you choose the right grind size setting. If everything looks good, continue grinding until all of the beans have been ground. When all of the beans are ground, you will notice the handle starts to turn more freely.
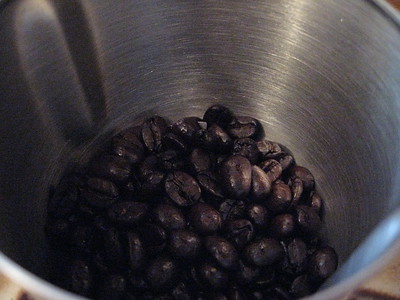
Step 5: Remove the Grounds and Brew Your Coffee
Unscrew the ground catcher or pull out the drawer or container on a coffee grinder machine and extract the freshly ground beans. At this point, your grinds are ready for brewing.
All that is left is to clean up any stray grounds that may have been scattered, put away your coffee grinder, and enjoy your fresh coffee, yum!
Other Coffee Grinding Details to Consider
Why Should You Grind Your Coffee Beans at Home?
While pre-ground coffee is convenient, most coffee connoisseurs prefer grinding their own beans at home. This is because fresh-ground coffee has a better aroma and taste than instant or pre-ground coffee beans. Fresh-ground coffee is even thought to be healthier than pre-ground coffee in some respects. Whole beans are often less expensive as well, so what do you have to lose?
When Should You Grind Your Own Beans Beans?
Coffee lovers agree you should grind your coffee beans right before you plan on brewing them. It s also recommended you only grind what you need. Of course, if you want to grind a bit more than needed for your morning brew, you will already have some grinds ready for an afternoon fix.
Grinding Coffee Made Easy
Now that you know all about the many benefits of grinding your own coffee at home and how to use a coffee grinder, both electric and manual, what do you think? Could a burr grinder be a welcome addition to your home? If you already have a burr grinder, you should be all set to start grinding coffee beans as soon as tomorrow morning or during your next coffee break. Keep in mind that it is often best to change the grind size setting before you add the beans and only grind as much as you intend to use at a particular moment, and you’ll be grinding like a professional in no time at all.
Let us know what you think in the comments below.
Additional Resources
- How to Grind Coffee Beans Without a Grinder
- How to Make Ground Coffee
- How Are Coffee Beans Grown
- How to Froth Milk Without a Milk Frother