If you own a stand mixer, it’s time to get busy and creative in the kitchen with must-have attachments that make your life easier and enjoy warm, delicious bread and more dough-based food.
In today’s article, we’re exploring how to use dough hooks on a hand mixer. Continue reading to get clued up on these attachments.
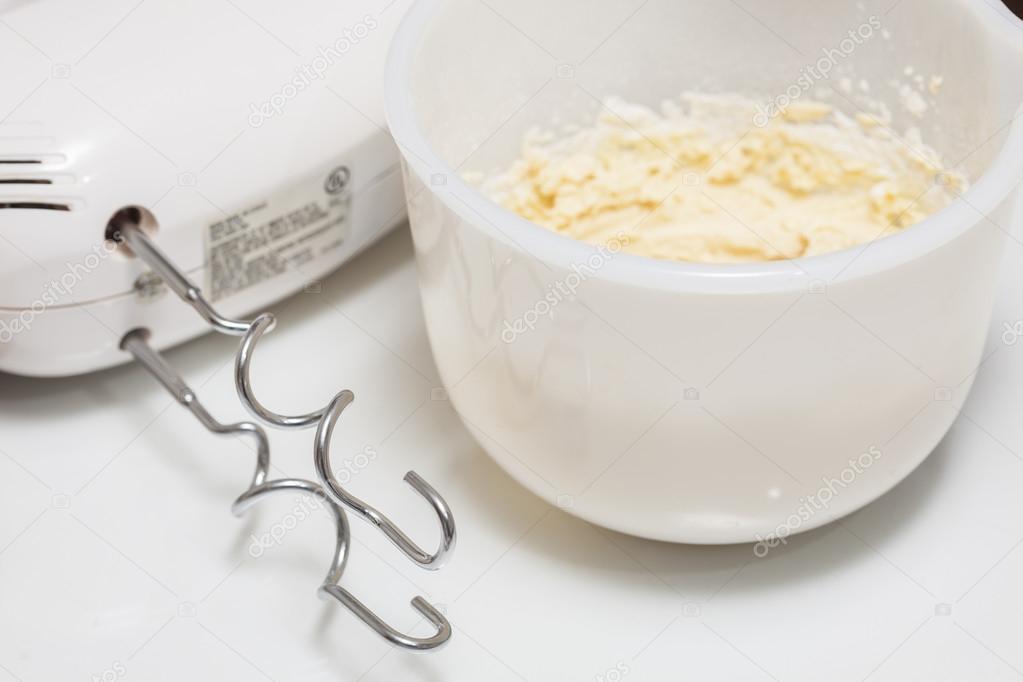
What Are Dough Hooks?
Let’s begin this article by explaining what dough hooks are and how you can spot one. Most stand mixers come with this attachment, but it’s not always regularly used.
However, you can recognise dough hooks due to their curved shape and interwinding design made for kneading dough quickly without using your hands. This is a great way to keep things sanitary.
Dough hooks are effective at encouraging the gluten in the dough to develop, which is responsible for keeping air bubbles away, improving elasticity and creating an overall fluffy texture.
Instructions on How to Use Dough Hooks on a Hand Mixer
Just follow the steps below if it is your first time using a hand mixer or if you want to make sure you are doing everything correctly.
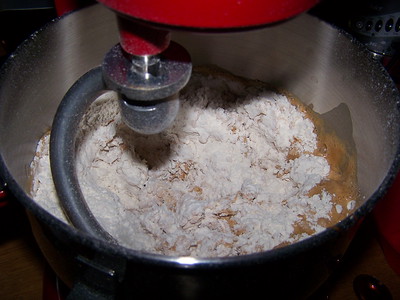
Step 1: Attach the Hook in Your Hand Mixer
You should begin by attaching the hook to your hand mixer. At first, it might look a little unusual (especially if you’re used to other attachments), but once you place it into the mixing bowl with other ingredients, you’ll soon get used to its unique shape.
Begin by mixing up butter first and using a sieve to add flour, baking soda, salt, sugar, and other ingredients for various doughs. After adding the entire ingredients to the mixing bowl, power on the mixer to combine all of the ingredients.
Step 2: Add the Milk
The second step is to add the milk to the bread dough (or other doughs that you’re making). You can keep the mixer in the bowl while you do this, but beginners might want to remove the mixer from the bowl at this point.
Choose a speed that’s not too fast to give you some control over the appliance and to minimise vibrations.
Continue using the hand mixer in the bowl, mixing all ingredients. Take several pauses to check that the dough is springy and bounces back when you stick your finger in it. If the dough doesn’t bounce back, you’ll need to continue using the hand mixer until it does.
Step 3: Finalise the Dough
Finally, it’s time to finish the recipe, depending on what you’re making. Roll out the dough and use cutters to make the shapes for the biscuits.
While for pizza dough, roll out the dough into the desired size and thickness and add toppings. Add raisins and any other dry ingredients you prefer to inject some flavour for homemade scones.
What Should You Do When Dough Gets Caught on the Hooks?
It’s common for bread dough to get stuck on hand mixers, but it’s important to know why this happens to prevent it. Bread dough is the most common type of dough that gets tangled in dough hooks. This is mostly because of not enough water added or poor-quality dough.
Compared to hand kneading, the dough needs to be softer when you use a hand mixer, and it should be able to touch all sides of the bowl. When you pull the dough away, it shouldn’t leave any residue, creating a clean removal.
However, it should remain wet enough that it’s the perfect consistency for baking while not hooking around your attachments. Moreover, you can prevent this from happening by not kneading your mixer for longer than two minutes, allowing yourself enough opportunity to check the dough’s consistency.
Is a Dough Hook the Same as Kneading With Your Hands?
You might be wondering about the benefits of learning dough hooks on a hand mixer and if it’s the same as kneading. Fortunately, using a dough hook allows you to save a lot of time in the kitchen and is an effective attachment for making bread dough, pizza dough, etc.
However, it’s important to note that using a dough hook isn’t the same as kneading with your hands because it’s much more difficult to control how you knead the dough.
But using dough hook attachments saves you time in preparation and gives your hand a rest. You need to use your hand mixer with a dough hook to get used to its action and the results.
You should feel confident that you have smooth dough at the hand mixer’s end because the dough is ready to go in the oven.
General Tips for Using a Dough Hook
Now that you’re aware of the steps for making bread at home using a dough hook, are you ready to bake? Here are some general tips to consider when using this attachment.
Knead for the Right Amount of Time
You can knead for up to 10 minutes, though some doughs require slightly more or less than this time, depending on the stand mixer and the speed setting you’re using.
To guide you, ensure that you take regular short breaks to monitor the dough’s structure, ensuring that it’s not too slack or too stretchy.
Know When to Stop Kneading
You must know when to stop kneading light and heavy doughs. At the start, the dough will feel lumpy and wet, and it will probably stick to the mixing bowl.
If the dough is at the right consistency, it’ll feel soft and be able to stretch across a surface without tearing and breaking. It’ll also allow light in.
It leads to a crumbly interior and hard crust when you over-knead. So follow these steps to prevent this from happening.
Supervise the Mixer
It can be tempting to leave the mixer in action since it’s handling all the hard work. But never leave your appliance unattended, which might lead to accidents and undesirable results. While the machine mixes, hold onto it to keep it sturdy on the countertop.
Some doughs can cause the machine to move more than others. For example, thicker ingredients require more effort, so the mixer will have to work harder to mix everything, causing the appliance to move.
Operating These Attachments
These attachments operate at high speed and mix various dry and wet ingredients for a delicious homemade recipe.
Ensure that you mix in some moist ingredients—like butter—to prevent the ingredients from sticking to the mixer and helping to combine everything.
Do you have any tips on using these attachments or a recommended stand mixer available on the market today? Share your thoughts in the comments.