Have you ever used a meat thermometer when cooking your favourite meat?
Every meat connoisseur or bbq expert needs a meat thermometer! These handy tools allow you to take the internal temperature of various meat quickly. As a result, you can precisely determine when the meat is done. But how do you use such a device? Be at ease! To help you create extra delicious meat dishes, we’ll look at how to use a meat thermometer in this guide.
How to Use a Meat Thermometer: A Simple Guide
Now that you have some basic information about using a meat thermometer, we can look at the specifics.
This guide varies depending on the meat thermometer’s model and design. Regardless, the following five steps should give a basic outline of the process:
Step 1: Make Sure You Know the Desired Cooking Temperature
Before getting your meat thermometer ready, you must have a firm idea of the minimum internal temperature of the meat you are cooking. Without this information, you are essentially guessing.
Ideally, you should already have a firm idea of the cooking time and safe internal temperature of various meats. You then know exactly when your meat is properly cooked and when it will be safe to eat without causing any foodborne illness.
Step 2: Test Your Meat Thermometer
While most meat thermometers are pre-calibrated, testing them beforehand is a great thing to do. If you test your instant-read thermometer, you can ensure it will provide an accurate reading.
The simplest way to test digital instant-read thermometers is to use ice water. Place the thermometer probe into a glass of ice and water. Then, wait for approximately 20 seconds. At 20 seconds, take the reading. If the digital thermometers work correctly, the temperature should read 0 degrees Celsius.
Step 3: (Depending on Meat Thermometer Design) Place the Probe in the Meat
The next step depends on the design of your thermometer.
Also, we advise checking the manufacturer’s instructions first, too. They should state precisely how to use the probe and thermometer and safe working practices. The manufacturer’s instructions often provide helpful cooking tips for meat types like beef and poultry.
Step 3A: Oven-Going Meat Thermometer
Some meat thermometers have a stainless steel probe attached to a thermometer unit.
You place the probe into the meat as soon as it enters the oven with such units. Next, place the thermometer unit outside the oven with the oven door closed. Some meat thermometers in this style have a wired cable that trails outside the door, whereas others use wireless connections.
The thermometer can then sit outside the oven, and you can take temperature readings periodically without losing heat when opening the oven door.
Step 3B: Instant Temperature Thermometer Probe
Other meat thermometers provide instant readings and must be used while the oven door or bbq lid is open. This is less convenient as you allow some heat to escape whilst taking an accurate reading.
With a digital instant-read thermometer, you must open the oven door or BBQ lid. Place the probe section of the thermometer into the meat whilst it is still in the oven.
We advise doing this using oven gloves or protective gloves. Depending on the size of your cooking compartment, it can be difficult to insert the probes into the meat without burning your hands or arms. Do this carefully – if needed, pull the cooking tray out slightly so that the meat is at the front of the oven (but still completely inside).
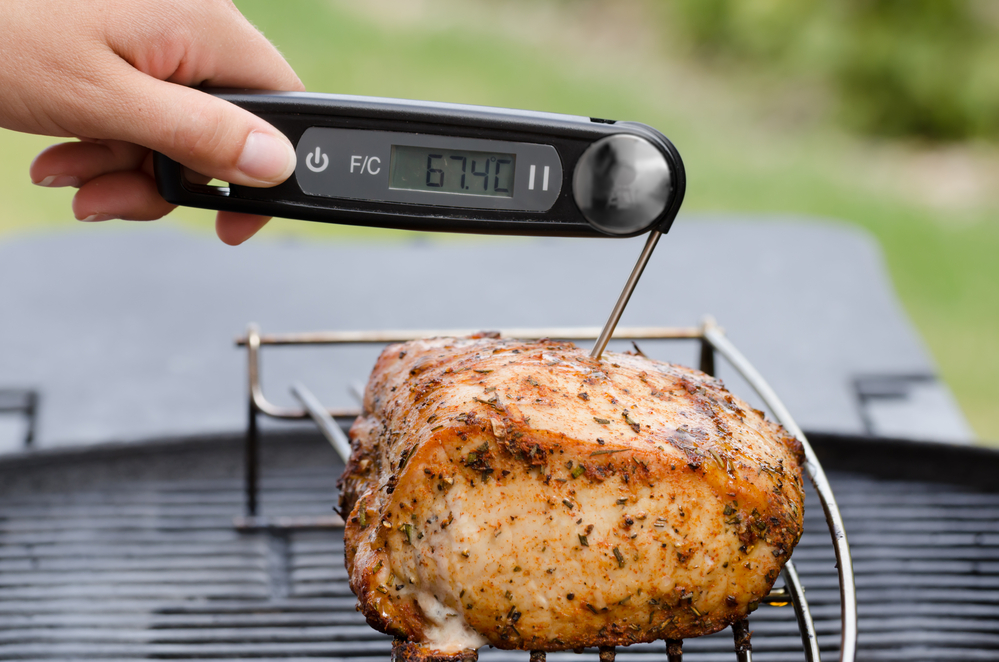
Step 4: Read the Temperature
Regardless of which device you have, the next step is to read the temperature!
For exterior thermometers, you can check the internal temperature from the unit wherever you have placed it. Often these devices have a built-in alarm that beeps and flashes when the meat has reached its safe temperature. This can make cooking meat incredibly easy.
For instant reading thermometers, you should usually get an accurate temperature reading within 2-5 seconds after you have inserted the probe. Make a note of the temperature, remove the probe, and close the door or lid.
Step 5: Continue Cooking or Remove Depending on the Result
The last step is simple. If the temperature is still too low, your meat is not ready! In which case, continue cooking. Then, test the temperature periodically again until the ideal temperature is reached.
If the temperature is correct, you can remove the meat and let it rest for 10 minutes. During this resting period, the internal temperature of the meat will continue to cook it and prevent some of the tasty meat juices from escaping.
Meat Thermometer Tips
We have provided many tips relating to using meat thermometers to finish. Aside from the basic process, there are several essential things to remember. These involve the placement of the probe to get the most accurate temperature reading.
Inserting to the Right Depth Is Important
The depth in which you insert the thermometer is also significant. Most meats like chicken breast and whole turkeys cook quicker than they do on the inside.

As a result, if you do not insert the probe into the thickest area of the meat, you may get a false reading. This could lead to undercooked meat and foodborne illnesses like salmonella.
Generally, the simple rule to remember is that you must insert the probe into the thickest portion of the meat. For example, if you were cooking a meat joint, you should insert the probe deep into its centre.
This will ensure that you can get an accurate reading from the middle of the joint. This is important as it is generally the part that takes the longest to cook.
The central section of the thickest part should be at the correct temperature for perfectly cooked meat. If the thickest part does not reach this temperature, harmful bacterias remain, leading to food safety issues, and you don’t want that to happen.
Inserting Into the Correct Part of the Meat Is Critical
Not only is the depth important, but the placement is important too. As a general rule, you must avoid placing the probe in or next to any fat, bones, or gristle.
The probe must be inserted into actual meat material for the best reading. The temperature reading will be inaccurate if you insert it into bone, fat, or gristle. This is because the composition of bone and fat is different to meat. As a result, they will react differently during the cooking process and may give different temperatures to actual meat.
Don’t Remove the Food From the Heat Source

People often remove the food from its heat sources when using this device, such as the oven, stove, or BBQ. Unless essential, you should never do this.
Removing meat from its heat source can result in an inaccurate temperature reading. When you remove it, it will immediately lose some of its temperature from the change in external temperature. As a result, the reading will most likely be wrong when you use your probe.
Therefore, always take the temperature with the meat still inside the heat source. We appreciate that you have to open the door when using instant-read devices. This will let some heat escape, but the reading should still be accurate.
This is also why outside-oven meat thermometers are such a great tool. You can use them on cooked food without ever opening the oven door during the cooking process.
Can You Use a Regular Thermometer to Take a Temperature Reading?
No! Standard thermometers for human use usually do not read high enough compared to the proper temperature for cooking meats.
Can You Leave a Meat Thermometer in the Meat While It Cooks?
Yes, the probe can usually stay in during cooking. However, we always recommend checking the manufacturer’s guidelines before doing so.
Cook Your Meat to Perfection Using a Thermometer!
Hopefully, you have benefited from this guide on how to use a meat thermometer. Don’t be afraid to use one, for this is a simple but effective tool that is brilliant to help you cook meat joints, steaks, BBQs, and even a Sunday roast.
Using food thermometers can improve your timing. What’s more, they assist you in making sure you don’t get the wrong temperature which could lead to undercooked meat and the build-up of harmful bacteria.