A juicing machine is a brilliant kitchen appliance. With these machines, you can create fresh juice from different fruits and vegetables. For example, you can extract citrus juice and fresh pineapple juice. They are handy instruments that can increase your intake of fruits and vegetables as well as fluids. In this article, we look at how to use a juicer. They can be tricky to use, so understanding the basics, like food preparation and cleaning, are important!
What Foods Can You Juice?
Before we look at the process, it’s important to know what you can place in a juicer. Fruits and vegetables are the most common items used in juice recipes. Most fruits and vegetables have high water content. As a result, they are perfect for juicing, and you can easily extract their goodness. The following are common foods you can turn into juice:
Fruits
Fruits are the most common item that people create juice from. Most fruits are simply bursting with nutrients, water, and juice that your juice extractor can access. The following are some amazing whole fruits that you can use with most juicers:
- Citrus (Lemon juice, lime juice, orange juice)
- Apples
- Grapes
- Melons (Cantaloupe, watermelon, honeydew etc.)
- Pineapple
- Pears
- Berries (Blueberry, raspberry, strawberry, etc.)
- Pomegranates
- Peaches
- Mangoes
Citrus fruits like oranges and lemons are tangy and have a vibrant taste. Alternatively, fruits like grapes and apples have a more subtle taste without tartiness. You can use fruits for making smoothies or simply to make refreshing fruit juice.
Some fruits, like berries, have a smaller juice content. This means that you have to use more berries to get more juice. However, the concentration and flavour of the juice are usually amazing.
By juicing fruits, you can gain a healthy dose of nutrients and minerals that your body needs. For example, apples are packed with potassium and fibre. Alternatively, oranges are an excellent source of Vitamin C.
Vegetables

Whilst fruits are probably the most popular choice, many people also create vegetable juices. Vegetable juice offers a completely different taste to fruits but is still packed with goodness and the nutrients and minerals you need. The following are the most common vegetables to create green juice:
- Broccoli
- Carrots
- Celery
- Kale
- Spinach
- Tomatoes
- Cucumber
- Beetroot
- Cabbage
Some vegetables like cabbage and spinach have a far-stronger taste. As a result, not everyone may like them. However, juicing leafy greens and creating a combination of flavours can result in some amazing juices.
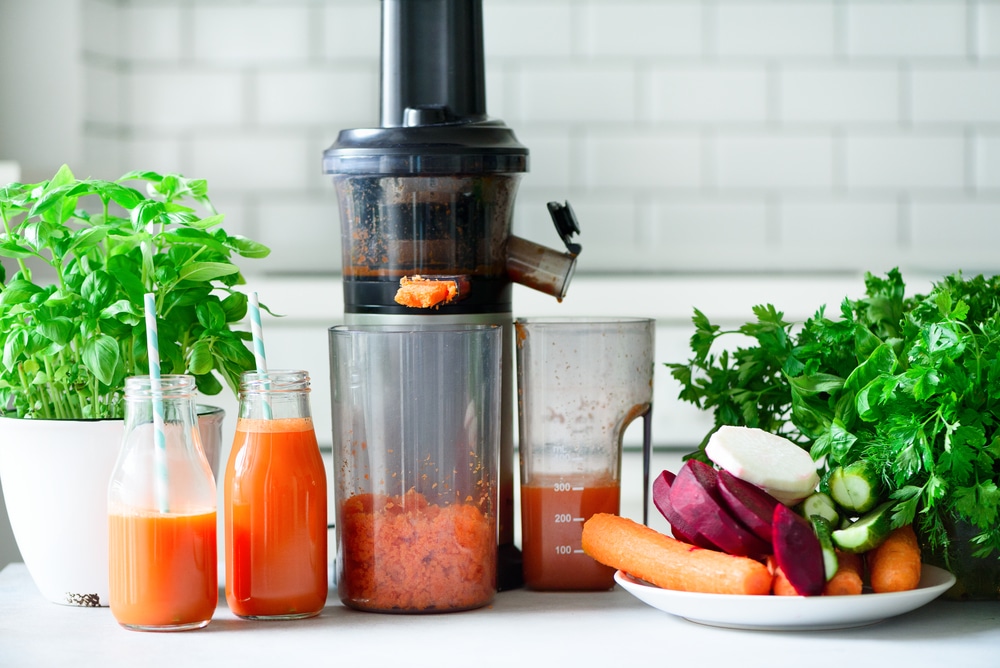
Carrot is an obvious choice, and this is commonly used in centrifugal juicers. Carrot has a lovely sweet flavour, but it also contains healthy doses of Vitamin A, potassium, and biotin. Kale is another excellent choice as it has a milder flavour. It works well with other foods and is also a great anti-oxidant.
How to Use a Juicer – A Simple Guide
Now that you know what to fetch from the grocery store for your juicer, we can jump into action. Below is a simple 9-step guide on how to use a juicer. Please be aware that the exact process may differ slightly depending on the type of juicer you have.
Step 1: Familiarize Yourself With the Machine
Before preparing or adding any ingredients, it is vital that you familiarize yourself with your juicer. If you do not understand how it works or where the different features are, the process will be that much more difficult.
First, read the instruction manual thoroughly. This should contain important information on how to use it. It may also include info on the different fruits and vegetables you can use.
Once you have read the manual, spend time looking at the juicer. Find where the different parts are, like the feed chute and the output pipe. Knowing where everything is should allow you to juice things easier with less mess.
Step 2: Gather Your Equipment and Supplies
Next, it’s time to gather your equipment and the food! Common supplies you need include:
- Cutting board
- Sharp knife
- A collection container or glass (have spares too)
- The juicer
- The ingredients
To prepare the ingredients, you will need a cutting board and a knife. It is also important to have a collection container or glass. These items are what you will collect the juice in.
Once you have the equipment, you should then clear a working area on your kitchen work surface. It is not a great idea to try to use a juicer or prepare fruit if you have barely any working space.
Step 3: Prepare the Ingredients
Next, you can prepare the ingredients! Before cutting them, it is important to rinse them in water to remove any dirt. Giving the food a rinse could also remove any lingering pesticides, although this shouldn’t be an issue for organic produce.
Next, cut the food into sensible chunks or pieces. You should not try and put whole fruits into a juicer, except for smaller items like berries. Some foods will also need peeling, like pineapples and bananas. However, fruits with thin skins, like apples, do not need to be skinned first.
You should also remove any seeds, stems, and pits that are exposed on the outside, as these could clog the juicing mechanism.
For vegetables, you should roll or compress them into small-sized balls. This will help them juice quicker. It will also help the juicer extract the nutrients and goodness from the leafy greens and vegetables.
Step 4: Setup the Juicer
You can now set up the juicer. Plug it in and place the collection container or glass underneath the exit chute. Make sure that you can easily access the exit chute and that you can quickly replace the glass in the event of an overflow.
Step 5: Add All the Ingredients to the Feed Chute
This process may differ depending on the model.
Some juicers allow you to place the ingredients into the input area first and power the juicer after. If so, simply place the ingredients in the correct place, replace the lid, and power up the juicer.
Alternatively, many juicers require that you power the device first. Once the device is switched on and the setting selected, you can then push the ingredients into the feed chute. If you have to push the ingredients in, be careful not to push too hard. You can risk damaging the motor and overworking the machine.
Step 6: Start Juicing!
With the ingredients fed into the feed chute, you can now replace the lid and power the juicer (depending on the process).
Exactly what happens now depends on the model and design of the juicer. Some juices may simply have a power switch that starts the process. Others, however, may have different juicing settings for different food items. As mentioned above, you may also need to push the fruit or vegetables into the feeding area as the juicer is powered.
This is why it is important to read the instructions so you understand what settings to use. Choose the desired settings, and start the juicing!
Step 7: Periodically Check the Process
Many juicers do not have automatic settings or preset options for different fruits. As a result, you usually have to watch the process. Once the juicing has started, periodically check the process. You should easily see how much juice is being extracted.
Once the juice flow starts to dry up, you know that the process is nearly complete. It is always a good idea to have several spare glasses or jars handy too. The glass you have or collection glass could easily overflow, and this would create a fantastic mess! If you have multiple glasses ready, you can simply switch them out if one is full.
Step 8: Turn the Juicer Off, and Enjoy Your Creation!
Once you are sure the juicer has extracted as much as possible, turn it off. Make sure that it is switched off and unplugged from its power outlet. This can prevent any potential safety issues. Make sure the power cord is also not somewhere that you could catch it or trip over it.
It’s nearly time to enjoy your fresh juice packed with healthy nutrients! Depending on the model, your juice may have poured directly into a glass. If so, you can enjoy it immediately! However, if it has been juiced into a collection glass, simply pour it into a fresh glass and enjoy!
It is recommended that you drink your juice within 24 hours – even if it has been refrigerated.
Step 9: Cleanup and Wash the Juicer
Knowing how to use a juicer is more than just the juicing process!
Whether you have a cold press juicer or a centrifugal juicer, the process is generally messy. You are working with fruit and vegetables, which results in a heap of pulp, seeds, and food debris. As a result, once you have finished juicing, you should always clean up and wash the machine.
If you do not clean the machine properly, you could leave food debris that could go mouldy. The first cleaning process is to check the pulp collection tray/unit. Oftentimes you can reuse the pulp and place it in the juicer again to create more juice. If not, empty the pulp container and wash it thoroughly.
Next, remove the detachable parts. If the parts are dishwasher-safe, you can simply place them in your dishwasher for a thorough cleaning. If not, rinse them with warm soapy water and give them a thorough wipe. Before replacing the parts, make sure they are completely dry.
General Tips for Using a Juicer
Now you know how to use a juicer, here are some final tips to help your experience. As you can see, the juicing process is relatively simple. However, there are some simple tips you can use to make the process easier and quicker.
Avoid Using Dry Foods
A juicer’s purpose is to extract juice and nutrients from fruits and vegetables. As a result, you should not try and pulp food items with low water content. Sugar cane, grains, and coconut are examples of these items. thankful
If you try and juice foods with low water content, the result could be disastrous. Firstly, you will struggle to extract any juices. Secondly, you could risk damaging the machine.
Don’t Leave the Cleanup Process
It is tempting to simply leave your new juicer and clean it at a later date. Don’t do this! Juicing fruit is a messy process. As a result, there is often leftover pulp, peel, debris, and juice. If you simply leave these items and don’t clean your juicer, it may not function properly.
Also, the excess food mess will eventually sour and could leave a nasty smell in your juicer. We advise cleaning your juicer after each use. By doing so, you can keep on top of the process and make sure it always works properly.
Consider Using a Strainer to Further Purify Your Juice
Oftentimes a single glass of homemade juice will still contain pulp and seeds. If you do not want any excess pulp or lumps, you should use a strainer. Complete the juicing process as usual and collect the juice in a container.
Next, place a strainer over the glass you wish to drink the juice from. Pour the juice over the strainer and into the glass. This should effectively remove any impurities and remaining pulp from the juice. You should then be left with extract juice that doesn’t have any bits!
Become a Pro Today and Benefit From Freshly Made Juice!
A juicer is a brilliant item to have in your kitchen. It allows you to turn items like apples, carrots, lemons, kale, and other veggies into amazing fresh juice. This is a great way to increase your fruit and veg intake and also to stay hydrated!
From this guide, you should now have a clear idea of how to use a juicer and the different items you can use it with. All that’s left to do now is to start juicing and see what tasty drinks you can create!