Knowing how to install a water softener correctly is clearly an important thing. After all, you want the device to work correctly, or what was the point of it?
But if you are at all concerned about installing a water softener, then don’t panic. This is something that is going to be substantially easier than most people are aware of. Also, you don’t require a lot of know-how in order to do it successfully.
What is a Water Softener?
But before you go ahead and install one, you may want to know what we mean by water softeners.
Depending on where you live, you may have excess minerals in your water supply, which could mean that you have exceptionally hard water. This means there’s too much calcium, magnesium, and various other minerals in the water coming from your taps and shower.
Removing these harsh minerals and replacing them with sodium means you require less soap to get things clean. Yes, those minerals make a difference in how soap can react with water, and they are going to make your life a whole lot harder.
But also, even though those minerals are being replaced with the likes of sodium, don’t panic about whether or not you can drink the water. This isn’t sodium like you get with salt, as that’s something completely different. Also, it’s safe to have sodium in water, up to a certain extent, and a water softener is not going to put too much in that you will even notice a difference.
How a Water Softener Works
Just prior to actually taking you through the installation process, let’s take a quick look at how a water softener works.
A water softener unit works by using something called ion exchange. That means it’s exchanging one thing for another, and in this instance, it’s minerals with sodium. That is what produces softened water, and it’s all done by having your water supply pass through the water softening system.
Your water supply line comes into the softener device, and it enters what’s known as the mineral tank. Contained within this tank are beads, and the water flows through them. They are charged with sodium ions, and that’s where the exchange takes place.
Then, water flows out the other side of the softener device, and this time the hard ions are left behind, stuck to the beads.
However, let’s get on installing a water softener in your home.
Step 1: Turn Off Your Water Supply
So the first step is to clearly turn off your water supply. You need to disconnect this, as the water softener must be installed within the water flow itself. Also, when you have shut off the water, make sure you drain the water that’s in the pipes to make sure everything is empty.
Step 2: Cut Into the Water Supply Line
The second step is the scary one, as you need to cut into the cold water line that supplies your house. Remember that this is not simply for the kitchen, but rather a water softener should work for the entire house, so go to your main line rather than anything else.
You are going to need a pipe cutter to do this, but you need to make sure you measure the space required and know exactly where your unit is going.
Step 3: Assemble the Water Softener Unit
Depending on the water softener systems you are installing, you may not have that much to do when it comes to the assembly. However, you may want to check on the bypass unit and assemble that.
Step 4: Measure Your Pipes and Cut Them Accordingly
You need to carefully measure and cut the connecting pipes that will be going into your water softener system. If you plan on using copper pipes, then make sure you solder on any elbow fittings to prevent leakage in the future.
As a side note, you may find that using flex lines is going to be easier. It means you can avoid making so many cuts or manipulating pipes if you just use flexible tubing, so consider that as an easier option.
Step 5: Attach the Bypass Valve
You then need to attach the bypass valve first, and after attaching it, make sure you use professional plumbers tape to cover all of the threads. This is also going to make sure that there’s no leakage at any point.
Step 6: Attach the Drain Hose
Now, the water has to go somewhere, and that’s where the drain hose comes into play when trying to install a water softener. The drain, in this instance, refers to the way in which you allow the minerals from the hard water to be removed from the system. Without this, there will be a sediment buildup, and that’s going to cause problems.
Emptying the brine tank down a drain line will extend the lifespan of your water softener, so it is essential that this is done correctly.
So, you need to clamp the drain lines and feed them to the drain where they can escape. This may mean it has to go into the main floor drain or use the same drain aspect as you have on your kitchen utility sink or washing machine. That should make life easier, and at least you don’t then need to worry about the brine tank filling up.
Step 7: Attach the Water Softener
Exactly how you attach your own individual water softener is going to depend on what the installation manual says for your particular model. While they all work along the same lines, it’s always best to check the manufacturer’s instructions if there’s something slightly different with their own softener system.
If the manufacturer’s instructions are not clear, then it’s best to get in touch with them. If not, you do risk having to call out some additional plumbing help, and that’s something you have been trying to avoid.
Step 8: Connect the Outlet Port
The outlet port is where the water comes out of the softener to allow you to then use the water. Once again, check the water softener installation instructions from the manufacturer to see how they recommend attaching the outlet port to their model.
Step 9: Check Everything
By checking everything, we mean all of the connections and making sure they are tight and unable to leak. The last thing you want is for the bypass valve to not be on correctly or the drain line to be installed wrong, and then you have softened water all over the place.
Step 10: Turn On the Water
The final step is to turn on the water supply and then check to see that everything is flowing perfectly through your water softener. If the pressure is wrong, then double-check the connections just in case something is not quite right.
After that, your water softener is ready to use, and the difference it can make to your water supply is really surprising.
Final Tips
Even though water softener installation is easy, do call a professional plumber if you are at all concerned about causing some sort of permanent damage to your water supply. Installing a new water softener should not be too difficult, but it’s understandable that it can be stressful if you have never done something like this before. If you’re unsure, it’s always a good idea to seek expert assistance. However, if you’re feeling adventurous and want to give it a shot, go ahead and see for yourself if you can do it.
Also, make sure it’s connected to your cold water supply. You want to prevent hot water from getting into your under sink water softener as that hot water will damage things and cause all sorts of problems.
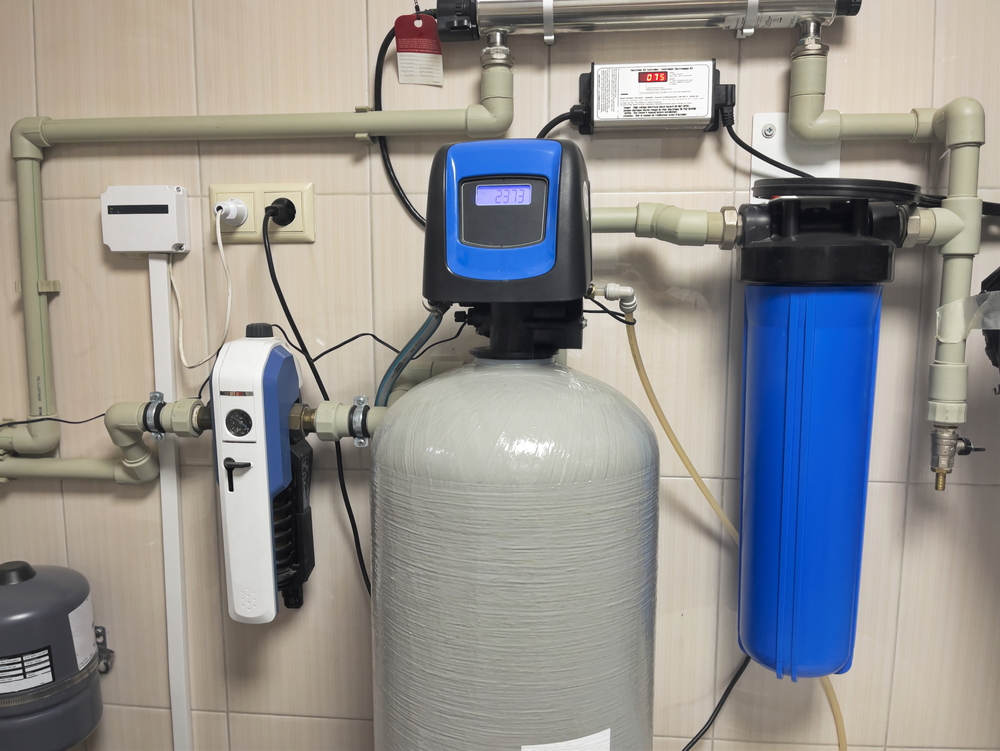
Water Softener DIY Installation
And that is how to install a water softener unit, and as you have just seen, it really does just involve a few simple steps for the job to be completed. Water softeners can make such a difference to things, and the way in which they can be installed in next to no time means you now have no excuse to go forward and have a water softener installed at your home.
Water softeners are a great invention, and water softener installation should not take the entire day, either. Don’t panic about doing something to your plumbing system or water supply system. There is help out there if you feel you are getting into trouble, but installing your own water softener takes limited knowledge, as the only tough part is cutting the pipes. However, those Flexi pipes will make a real difference, so consider that as an option if at all concerned.