Looking to grind coffee beans without a fine grinder? That’s absolutely possible when you follow the tips and tricks we have in today’s article. Revamp your morning cup of Joe or enhance your afternoon pick-me-up with instant coffee that tastes so heavenly that all coffee lovers will appreciate it.
The Benefits of Making Coffee Yourself at Home
So why should you turn freshly ground beans into ground coffee yourself at home instead of purchasing the pre-ground variety?
You Get Control
Firstly, grinding your own coffee beans allows you to be in control of the grind size, which has a large impact on the flavour of the finalised coffee. By being in control of the grind size, you can make the perfect cup of coffee that suits your tastes.
Fresh Taste
Best of all, homemade ground coffee will have a fresh taste since a coffee bean’s maximum flavour is when it’s removed from the roaster. By having the ground coffee freshly at home, you’re less likely to encounter a stale taste. Who knows how long the ground coffee has been sitting inside a coffee bag in the supermarket?
How to Grind Coffee Beans Without a Grinder
If you don’t have access to a coffee grinder, there are several ways to grind beans at home using tools that you probably have lying around. Below are our favourite methods, along with step-by-step instructions to grind coffee beans without a grinder.
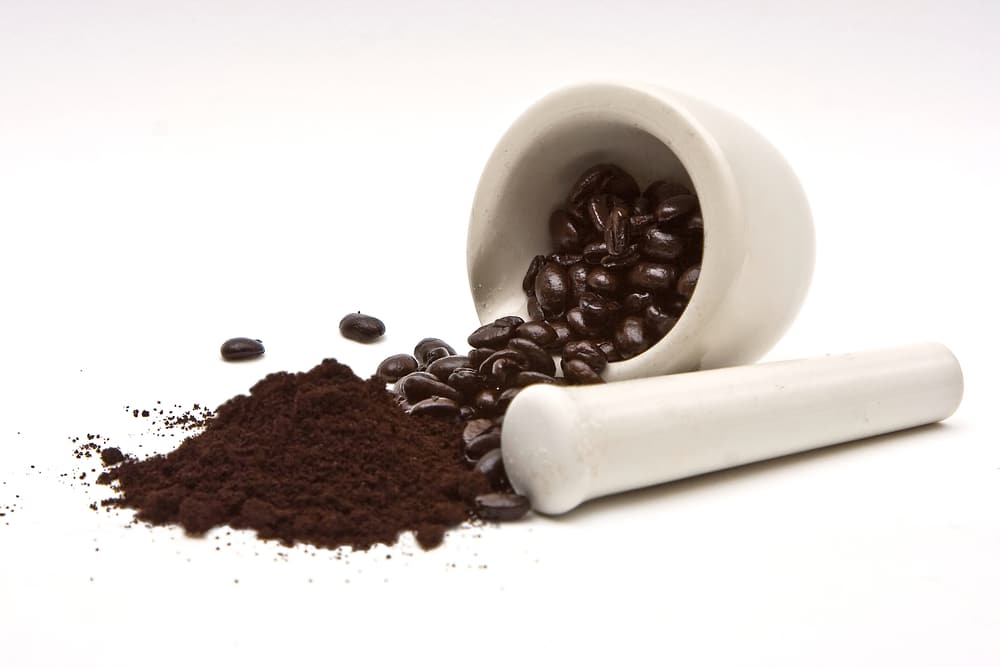
Use a Mortar and Pestle
A mortar and pestle is an effective way to grind spices, medicines, and herbs into fine powder. Using a combination of hammering and rolling the ingredients together helps to create a consistent mixture. Best of all, a mortar and pestle also work for grinding coffee beans into a fine texture.
Step 1: Add Your Coffee to the Mortar and Pestle
Add your required coffee beans into the mortar. You can add the entire amount of coffee beans in one go or begin with a smaller amount for a more consistent grind, repeating every few minutes.
Step 2: Grind the Coffee Beans
Use your strongest hand to grind the coffee beans in the pestle, using your other hand to keep the cookware sturdy on your countertop. The more strength you put into grinding the coffee beans, the more you’ll need to keep your hands sturdy to prevent any wobbles.
Step 3: Use the Pestle To Crush the Beans
Allow the pestle to do most of the work for you and create a consistent coffee grind. Continue working through all of the coffee beans in the mortar, adding more if required. If so, add smaller amounts at a time.
Once you’re happy that all of the coffee beans have been crushed, roll the grinds around with the pestle, grinding them more to a fine texture. The finer you can crush and grind your beans, the better.
Using a Garlic Press
A garlic press, which has an internal blade, is a great alternative to using a grinder.
Step 1: Add Your Beans to the Press
Add a small number of beans to the garlic press (being cautious, too, not add too little that the blades won’t reach the beans).
Step 2: Squeeze the Device
Using the same force as crushing garlic, squeeze the press to crush the beans into a grind. Check that all of the beans have pushed through onto the other side. Make sure you put a container underneath to catch the crushed beans.
Using a Blender or Food Processor
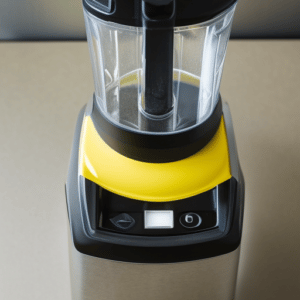
Alternatively, you can use a home blender or a food processor to grind coffee beans into a fine powder. A blender can chop beans in the same way that a conventional coffee grinder works. Best of all, many blenders come with a pulse setting, which makes them powerful enough for chopping coffee beans. But, for the best and safest results, you’ll want to grind the beans in small amounts. This is because operating a blender continuously means that the blades have to move at high speeds for long periods, leading to overheating. And not only can this impact the blender’s longevity, but it can also overheat the natural oils in the beans, resulting in a bitter, unpleasant taste.
Step 1: Use a High-Speed Setting
Firstly, set your home blender to its highest setting.
Step 2: Add the Coffee
Then, add your desired amount of coffee beans to the equipment, and cover your blender with a lid. Intermittently, grind your beans until they’ve reached your desired grind consistency. Continue grinding, adding more beans if you want to increase the amount of coffee.
Using a Rolling Pin
If you don’t have access to a high-speed blender or pestle and mortar, you can use a rolling pin to safely and effectively grind beans into the coffee ground. In fact, while a rolling pin requires some elbow action, it provides uniformity for excellent, smooth results. Best of all, a rolling pin can turn coffee beans into a fine texture, depending on how much action and strength you use. Bear in mind that you’ll need a chopping board to beat the ground coffee into a medium-fine grind.
Step 1: Place Your Grinding Beans Into a Bag
Beating your ground coffee straight onto a chopping board isn’t recommended. Instead, place your ground coffee into a transparent plastic bag or freezer bag, and lie this bag flat on the chopping board, making sure you expel all of the air before you begin.
Step 2: Use the Rolling Pin On the Ground Coffee
Once your ground beans are in a plastic bag, use the rolling pin to beat the pre-ground coffee into a super fine grind. Since your coffee grounds are safely tucked away in a bag, you can apply lots of pressure onto the beans. During this, you’ll likely hear some crashing sounds as you beat the pre-ground beans; this is completely fine.
Step 3: Roll the Pin Back and Forth
Finally, move the rolling pin back and forth until you’ve reached your desired consistency, which can be different for everyone. If you notice that the grounds aren’t at your grind consistency, continue to crush them.
Knife
If you’re limited on kitchen equipment, a knife is an effective way to turn your own beans into a powdered sugar texture. With a slightly wide blade, a knife provides a large enough area for grinding the beans and crushing them with ease. In particular, this process will typically create a coarser grind than the above alternatives.
Step 1: Place Whole Coffee Beans Onto a Chopping Board
Add your coffee beans onto a chopping board for a designated, tidy place to grind coffee beans.
Step 2: Place the Knife on the Beans
It’s now time to grind the whole beans using a knife. To do so, simply place the knife flatly on top of the coffee beans and press down firmly, using your palm to forcefully crack the coffee beans. You can roll the knife’s edge over the beans to break them up a little more and repeat the process.
The Different Coffee Grind Textures
Not sure about the grinding process and what coarse grind you need? Below are some of the most common textures to consider.
Extra Coarse Grind
This ground texture looks like peppercorns and is typically used for cold/iced coffee since the texture and size are perfect for submerging in water.
Coarse Grind
Slightly smaller, with the consistency of a piece of sea salt, this type of ground is ideal for French Press brewing and requires around a four-minute brewing time for the best results.
Medium Coarse Grind
Medium-coarse coffee ground, which resembles sand in size and texture, requires a two-minute extraction time for a balanced cup of coffee.
Medium Grind
You’ll want medium-grind coffee for drip coffee. This creates a typical-tasting cup of coffee.
Medium Fine Grind
Opt for medium fine coffee grinds for pour-overs.
Fine Grind
This type of coffee grind is best used in espresso and has a smooth texture.
Super Fine Grind
Finally, a super fine coffee grind is most commonly used in Turkish coffee.
Common Mistakes When Grinding Coffee Beans
When grinding coffee beans, there are some common errors that you’ll want to prevent. Below are some of the mishaps that can happen when you grind coffee beans yourself from scratch.
Grinding Too Much
One of the most popular mistakes made with coffee beans is grinding more coffee than you need, so you end up throwing away your own coffee grounds each time. To prevent this from happening, take into consideration how much ground coffee you need—including satisfying any guests. When not stored properly, your coffee grounds can go stale and tasteless.
Grinding Coffee Beans Too Early
You’ll also want to avoid grinding your coffee beans too early, as this can spoil the quality and consistency of your coffee.
Old, Poor-Quality Coffee Beans
You can’t expect to have high-quality, freshly ground coffee if your coffee beans aren’t high quality, to begin with. Ensure that your coffee bean doesn’t have a dark, shiny appearance, as this will create a strong and bitter taste. Alternatively, medium-roasted coffee beans are lightly coloured and offer a smooth taste.
How to Keep Coffee Grounds Fresh
Once you’re happy with the texture, flavour and size of your ground coffee beans, you’ll want to keep your freshly ground coffee lasting as long as possible. Fortunately, that’s completely possible with our tips below.
Proper Storage
Your coffee grounds deserve to be stored properly in order to remain fresh and tasty. For the best flavour, consume your coffee grounds immediately after grinding, as this is when they’re at their freshest. So we recommend limiting the number of coffee grounds you make upfront. But if you have leftover coffee, you don’t want to throw it away. So keep your crushed beans in an airtight container away from any heat, light or moisture. Preferably, opt for a vacuum-sealed container to prevent any of these factors from happening. This process can keep your coffee fresh for up to six months.
Freezing Coffee Ground
You might be asking yourself if you can freeze coffee grounds, and the answer is yes. In fact, frozen ground coffee can remain fresh for up to two years if it’s in a vacuum-sealed container. However, when you constantly remove ground coffee from the freezer and place it back in the freezer, these fluctuating temperatures create a buildup of moisture in the coffee bag, resulting in stale coffee after a while. So, if you must freeze your coffee, ensure that it’s for a long period of time rather than constantly removing the bag from the freezer. Also, if you place the ground coffee into a bag, ensure that it’s vacuum-sealed to prevent any moisture from the freezer from building up inside the bag.
You should avoid storing ground coffee in the refrigerator as the water molecules in the air will permeate the coffee, resulting in a nasty taste. Bear in mind that once you open the bag of coffee, it’ll lose its freshness. Therefore, you might want to use various bags or containers so that you only use the exact amount of coffee that you need at one time. Finally, ensure that you use glass or ceramic containers instead of metal materials, which can react with the coffee instead, resulting in a not-so-great cuppa.
Choosing High-Quality Coffee Beans
It’s essential that your grind coffee beans are tasty and high quality to begin with. So below are some important considerations to make when purchasing whole-bean coffee to transform into freshly ground coffee.
The Different Types of Beans
Firstly, you’ll want to choose between Arabica and Robusta beans. Arabica coffee beans offer a delicate taste and low acidity, which you’ll find in a coffee shop. On the other hand, Robusta beans have a more acidic flavour and a bitter taste, which is less preferred. However, they’re grown with less water, which makes them more environmentally friendly to grow.
Where the Beans Are Grown
In addition, did you know that the beans’ location also has an impact on the flavour? For example, coffee grown in Central America tends to have a bright, smooth and fruity flavour. On the other hand, beans from South America are sweeter and even boast hints of caramel. Or there are Asian beans that are more woody and earthy in flavour. Finally, African coffee beans tend to be the fruitiest of them all and even have hints of berries.
Light, Medium or Dark Roast
Light roast coffee has a smooth, bright and bitter taste. This type of roast retains the natural characteristics of coffee beans for a delicious cup. Alternatively, medium roast coffee retains all of its natural notes with a slightly reduced acidic flavour along with lower caffeine content. Finally, dark roast beans have a smoky aroma and a thicker taste.
Organic and Fairtrade
Once you’ve reached this point, you might want to take your coffee-choosing decisions to another level by considering organic coffee. Above all, consider a Fairtrade brand where the company treats their workers with respect.
The Different Types of Coffee Grinders
We know this article focuses on how to make ground coffee without a grinder, but below are some coffee grinders to also consider in addition to these homemade methods.
Manual Coffee Grinder
A manual coffee grinder looks like a pepper mill and operates in a similar way in that you add your coffee beans, screw the top on and turn a handle to crush the beans. This type of coffee grinder is great for making one or two cups of coffee a day, and only takes a couple of minutes to turn the handle to create ground coffee.
Best of all, this instrument is highly portable and fits into your backpack or suitcase, making it great for taking to work or on holiday.
Blade Grinder
A blade grinder is a low-budget way of making homemade ground coffee without a lot of elbow grease. However, this type of grinder won’t create a consistent texture compared to an expensive burr grinder, making it unsuitable for some people. However, it’s still better to use this type of grinder than to buy pre-ground coffee for a fresh-tasking cup of coffee.
Burr Grinder
Finally, a burr grinder is the best type of coffee grinder to choose for a consistent texture while providing a tasty flavour. Above all, burr grinders have multiple settings on them, which allows you to choose a consistency that best suits your preferences while also ensuring that you have the same results every time. Also, a burr grinder makes it easier and possible to have fine coffee grounds, making it ideal to them use your coffee ground in an espresso machine.
Enjoy Making Delicious Ground Coffee at Home
There are several ways to grind coffee beans without a grinder, such as using a rolling pin, garlic press, food processor, or mortar and pestle. Continue to grind the beans until you’ve reached your desired consistency, and you can’t go wrong. Do you have any other ways to grind without a grinder? Let us know your secrets (that the coffee industry doesn’t want us to know) in the comments.