Changing your kitchen tap yourself can save you some hard-earned cash, with most straightforward like-for-like installations being within most people’s capabilities. It can also be much more convenient timewise rather than waiting around for a plumber.
If you think you have the skills and patience required but are unsure exactly how to change a kitchen tap, then this article is for you! Read on and find out all you need to know to fit your new kitchen tap successfully.
What You Will Need
Here is a list of some of the most common items that you will need to change your kitchen tap. Bear in mind that this list is not exhaustive. You may need some extra items depending on what’s included with your new tap and any adaptors depending on your plumbing system.
- Basin wrench
- Open-ended box spanner
- Pliers
- Screwdriver
- PTFE tape
- New tap and fittings
- Cleaning cloths
- Towel
- Washing bowl
- Pipe cutters
- Olive splitter
Part 1: How to Remove Your Old Tap
Before you can get to work fitting your new tap, you’ll need to first remove the old one from your kitchen sink. Here’s how.
Step 1: Turn Off the Water Supply
First things first, before you even start getting ready, make sure that you turn off the water supply to your kitchen tap. If your kitchen tap has isolating valves, you’ll be able to simply cut the supply to your sink or kitchen. Otherwise, you may need to turn off your water supply to the entire house at the stopcock, as well as at your hot water supply tank.
If you are not home alone, make sure that you let other household members know beforehand that you’re going to be turning the water off.
Step 2: Prepare Your Working Space
With your water supply switched off, you can move on to preparing your working space. Clear your under-sink area so that it is easily accessible. If necessary, remove your cupboard doors to have enough room to work, lay down a towel, and have a bucket or basin ready to hand to catch any drips. You should have all the tools ready and nearby.
Step 3: Run Your Tap Empty
Although you have cut the water supply, you’ll want to run the pipes empty first before disconnecting your kitchen tap. This will save you a lot of cleaning up, especially if you have closed off your water at the mains. Turn your tap on and allow it to run until no more water comes out.
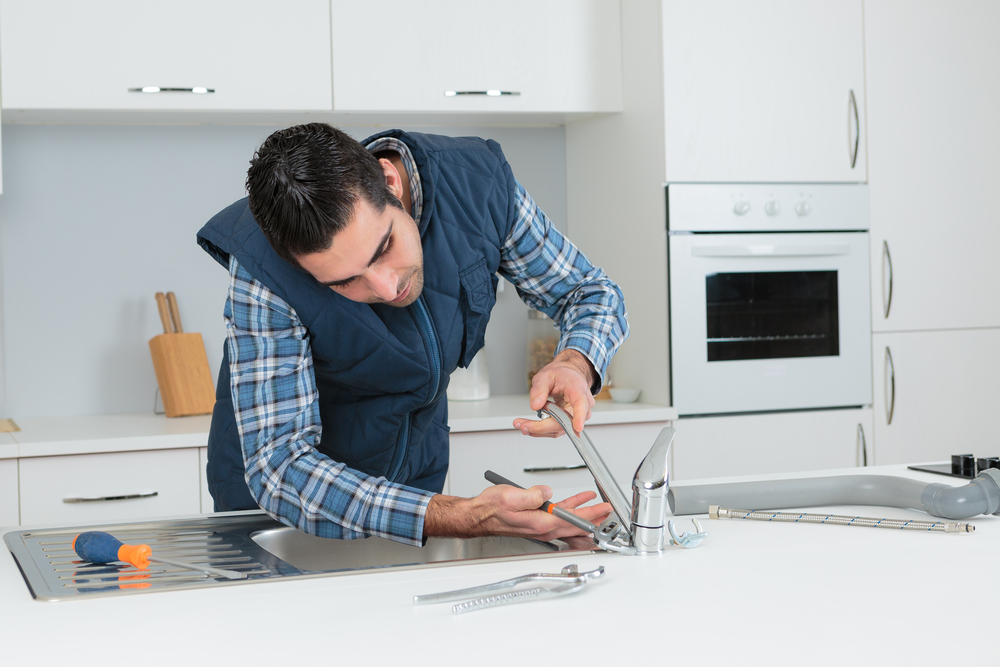
Step 4: Disconnect Your Old Tap
The next step is to disconnect your tap from the hot and cold water pipes. Loosen the connector nuts where your standard water pipe connections or flexible hose connect with your open-ended spanner to your tap. As you disconnect the pipes, some water is likely to leak out, so have your bucket and towel ready underneath to catch drips. For kitchen taps with compression fittings, you may need another spanner or your pliers to stop the pipe from twisting as you unscrew.
While this is, on paper, a very simple step, in reality, it can be hard work if the connections to your existing tap have tightened over time. You may need to apply heat or scrub off deposits, then use a lubricant to get stubbornly stuck plumbing fittings undone. For plastic fittings, you could try using slip-joint pliers and heat from a hairdryer.
Step 5: Remove Your Tap
Once you have disconnected your kitchen mixer tap from your water supply, the final step of part one is to remove it from your sink entirely. Once again, this should be simple. However, things can get tricky if the nut holding your tap in place has seized over time; plus, even with your basin wrench, it can still be difficult to get a good grip in such an awkwardly small space.
Once you have removed the large retention nut from the stud, lift out your old tap with its hoses attached via the tap hole. Be careful not to scratch your sink as you pull through the hot and cold water hoses as they may have sharp edges. You may want to protect any surfaces that could get scratched with a towel before pulling out your tap.
Well done! You’ve managed to remove your kitchen tap. Take a breather before you get ready for part two.
Part 2: How to Fit a Kitchen Tap
Once you’ve removed your old tap, fitting the new one will seem much less daunting. You’ve seen exactly how the old one fitted and have now had first-hand experience with your supply pipelines. Here’s part two of how to fit your kitchen tap.
Step 1: Clean Thoroughly
Before you start fitting your kitchen tap replacement, take a couple of minutes to clean the entire mounting surface around your sinkhole. You will need to remove any leftover sealant residue and debris from your old tap that could prevent your new tap from fitting flush.
Step 2: Assemble/Check Over New Tap
You’re so close to getting your new kitchen tap up and running that it’s all too easy to miss an important part or step.
Before you dive in, remove your replacement tap from its packaging and read carefully through any installation instructions. Some kitchen taps may require some assembly, so double-check that you’ve got yours set up correctly with all integral seals in place.
After reading the instructions, lay out all parts and make a mental note of what goes where.
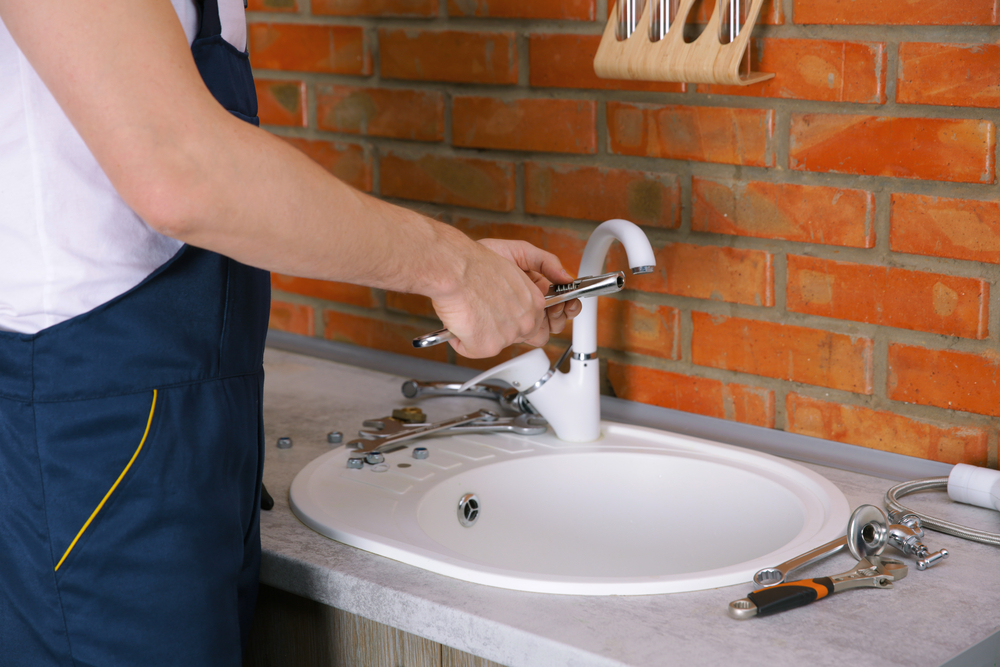
Step 3: Mount Your Tap
After assembling your tap as directed by the manufacturer (if necessary), it’s time to mount it. Place your tap or taps, if using pillar taps or bridge construction, into the sink hole or sink holes, ensuring that you place the right seal between your sink and the tap.
If fitting pillar, bridge combination, or dual lever taps, ensure that the hot tap is to the left and the cold tap on your right when facing your tap. With your washer and securing plate in place, screw your tap into position using your box spanner. If your tap seems too heavy for your sink, you should stop your installation and install a tap brace for additional support.
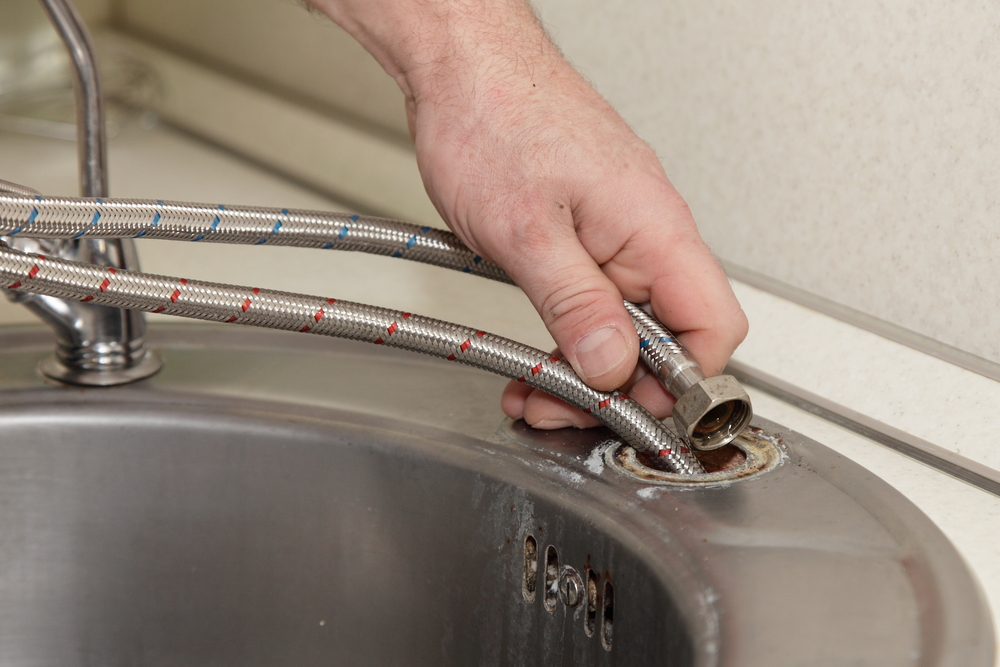
Step 4: Connect the Mains Supply
Individual pillar taps and bridge taps will need several layers of PTFE tape on the mains’ lower thread on both the hot and cold water connections. Modern kitchen taps use flexible hoses with flexible tap connectors. Reconnect the main supplies by maintaining the existing connection alignment, then using a box spanner. Do not overtighten, or you’ll risk damaging the connections on your hot and cold pipes.
Step 5: Turn on Your Water Supply
Check that you have connected your mixer tap correctly and that everything is tight. Are all looking good? Ensure that your tap is off, and then turn on the water supply by returning your isolating valves to their original positions or re-opening your stopcock and water tank valve.
Step 6: Check Connections and Turn on Your Tap
Check the mains pipe connections under your kitchen sink for any drips. Check over your tap, then slowly turn it on. Turn your tap back off and check again for any leaks. Your kitchen tap is now successfully fitted and ready for use!
FAQs
How Long Does It Take To Fit a Kitchen Tap?
It all depends on your experience level, the taps you are fitting (regular mixer taps, taps with flexible hoses, instant hot water taps etc.) and whether or not you hit any snags. If you’re pretty handy, you should easily have it done in under an hour. There are plenty of new taps on the market with easy installation systems and flexible hose connections.
However, you should allow for a couple of hours for your new kitchen tap installation if DIY is not your strong point or if you are dealing with an outdated installation where the mains water pipe connections have seized.
Is It Easy to Change a Kitchen Tap?
With this article, you should hopefully have a clear idea of how to replace a kitchen tap. Provided you take your time and are patient, installing kitchen taps is fairly straightforward with the right tools and equipment.
Make sure that you choose a quiet time of day (or night!) when you can completely focus on the task and are unlikely to be interrupted or have family members disrupted by the situation.
Ready to Replace Your Old Kitchen Tap?
Changing a kitchen tap is fairly straightforward once you have figured out exactly how it all goes together. Patience is key, so take the time to go back over this article on how to change a kitchen tap and make sure that you are familiar with all of the steps.
Once you have successfully fitted your new kitchen tap, keep an eye on your under sink connections for the next couple of days to ensure your mixer tap installation is completely leak-free. Congratulations on learning a new skill, and enjoy using your brand new kitchen tap!